Over the last week, we have begun our exploration of Right Angle Weave.
We began with the Basicsand learned to structure of the units and how to follow the thread path to reinforce and move through the bead work.
In the last post, we learned to used multiple beads per unit and discussed adding additional rows.
Now we are going to move on to Tubular RAW. There are a few different techniques you can use to achieve the same tubular effect using right angle weave.
In this post, I will be demonstrating the traditional form of the stitch.
Tools and Materials
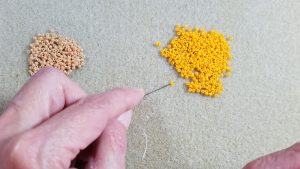
For this tutorial, I will be using the same seed beads I used before. I will be alternating between the two colors for each unit. In this way, the four sides of the unit will be emphasized and the thread path will be easier to follow.
2 colors of seed beads in the same size
1 or 2 colors of bugle beads in the same size
3 feet beading thread
1 beading needle
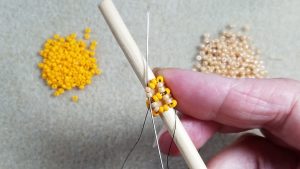
I will also be using a makeshift dowel to aid in technique. Actually it is a chopstick that just happened to be the right size for my purposes. A dowel is not required but it can be very helpful for beginners. Check out my affiliate link for a variety pack of dowels in varying sizes.
Row 1
For my sample, I will begin my base with units that are 2 beads per side. I will add four units to my base strip and join the ends together to form a tube, for a total of five units.
Refer back to the Basics post if you need a quick refresher.
Pick up 2 Color A – 2 Color B – 2 Color A and 2 Color B.
Pass back through all the beads again and reinforce the unit.
Move through the beads, one side at a time, until the working thread and tail threads are exiting opposite sides of the unit.
Add four more units to the base, with two beads per side.
Now we need to join the two ends together. To do this, we will create one last unit. We already have the top and bottom beads in place.
Fold the strip into a U shape or wrap around the dowel. As shown here, we already have both sets of Color A beads in place for the new unit.
Note that my working thread is exiting at the bottom of the Color A beads on the left.
I pick up 2 Color B and pass m needle up through the Color A beads on the right.
Now we need to add the last two beads of the unit.
I pick up 2 Color B and pass my needle down the two Color A beads on the left.
Pull the new unit tightly together.
Reinforce the unit again by passing through all the beads again, one side at a time.
Row 2
Move through the beads until your thread is exiting the Color B beads as shown.
Begin the row by picking up beads for the remaining three sides of the new unit.
Pass back through the Color B beads on the base to form the unit and reinforce all the sides.
Get into position by passing up through the Color A beads once again.
We already have two sides of the new unit. The Color A side and the Color B bottom.
The thread is exiting the Color A so we pick up 2 Color B and 2 Color A.
Pass the needle back through the Color B beads on the base going toward the previous unit as shown.
Reinforce the unit.
Come back around the unit until the thread is exiting the bottom of the Color A beads on the left side.
Pass through the next beads on the base
Now the thread is exiting the Color B beads so we pick up 2 Color A and 2 Color B.
Pass down through the two Color A on the right of the new unit.
Reinforce the unit.
Pass back through the Color B beads of the new unit.
Pass up through the Color A beads of the new unit.
Pick up 2 Color B and 2 Color A and sew back through the Color B on the base back towards the previous unit.
Reinforce the unit.
Come back around the unit until the thread is exiting the bottom of the Color A beads on the left side.
Pass through the next beads on the base
Pass up the two Color A beads on the right of the first unit in this row.
Pick up the last 2 Color B and pass down the 2 Color A beads on the right.
Reinforce the entire new unit.
Move through the unit until the thread is exiting the Color B beads on the top.
Repeat all the steps for Row 2 for each additional row.
The Tutorial
In the next post, I will show you an alternative way to create lovely dimensional bead work using Tubular RAW.
Get a jump on the lesson by creating a piece of work that is 4 units high by three units wide.
I will be using this sample with 2 bead per side units.