Hello and welcome back to Bead Weaving 101.
Today, we begin to explore a new technique used in bead weaving, Right Angle Weave or RAW for short.
As discussed in the Intro, the beads are stitched together with thread only making right angle turns, hence the name. The result is an almost fabric like piece of bead work. Right-Angle weave can be woven with either one needle or two. The units are square in shape and have four sides. Each subsequent unit is built upon the previous one.
As you add additional rows, the units are built upon the previous unit, plus the corresponding units below it.
With single needle right-angle weave, the thread path moves in a figure-eight pattern. For double needle right-angle weave, the threads cross each other along the center bead of each stitch as they head in opposite directions. RAW can be formed into flat pieces, tubes, or 3 dimensional figures.
I will demo the technique using seed beads first. In the video portion of the tutorial, I used bugle beads. I have found that using bugle beads in the beginning, helps to understand the structure of the stitch more clearly. Understanding the structure and thread path is very important to mastering this stitch.
It is especially important when creating complex patterns, because we must understand how to move through the work to position the working thread without creating unexpected results or exposed thread on the finished bead work.

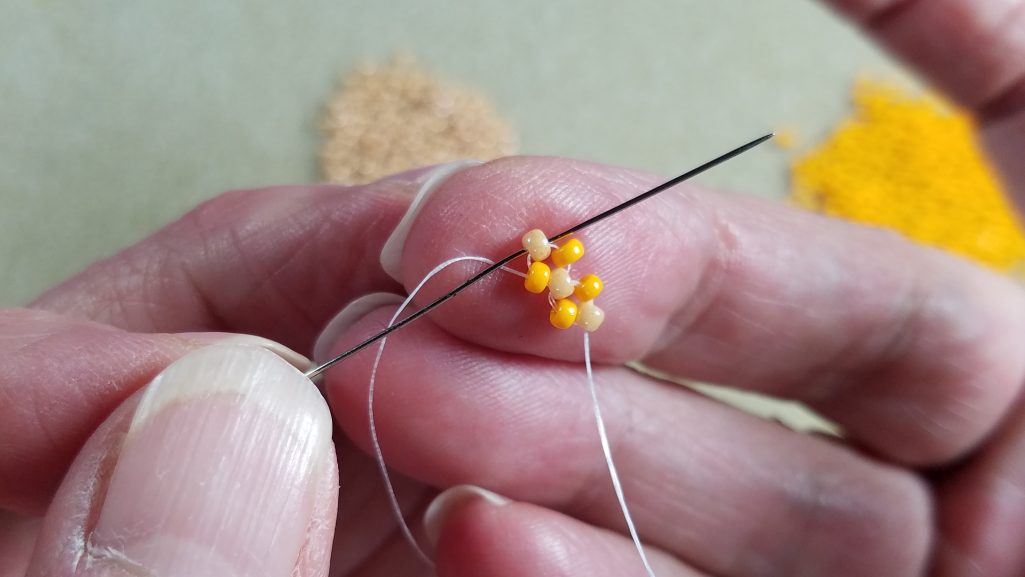
I find that using two colors of beads in the beginning also helps.
This will allow you to see the connecting sides with ease while you learn the basics.
Tools and Materials
- 2 colors of seed beads in the same size
- 1 or 2 colors of bugle beads in the same size
- 3 feet beading thread
- 1 beading needle
I think it may be beneficial to begin the tutorial with the video first.
In this way, the four sides of the unit will be emphasized and the thread path will be easier to follow.
The Technique
Now, let’s take a look at the technique using seed beads.
The fact that you can use any number or size beads in the RAW technique adds nearly unlimited versatility to the stitch.
First, I will demo using a single bead for each side.
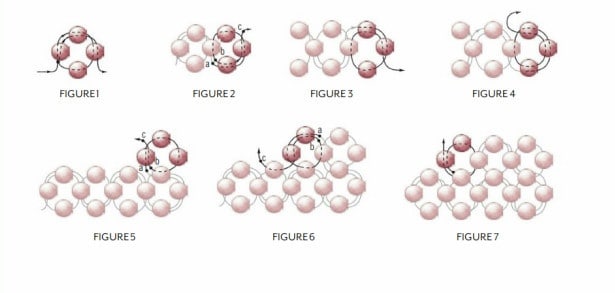
Pick up four seed beads, alternating the colors.
Pass back through the beads to form a loop.
Move through the beads, one at a time util the working thread is exiting the bead opposite the tail thread.


The top bead of this unit, will become the bottom bead of the next unit.
Pick up 3 more beads, and pass back through the bead on the base, from the opposite side as shown.
Reinforce each additional unit and get into position for the next unit, in the following manner.


Repeat the steps above to add additional units to the end of the row.
In the next post….
The next tutorial will cover using multiple beads for each side of the units.
And we will explore adding additional rows to the bead work.
