Welcome to Part 3 of this month’s project, Pearls on the Halfshell Necklace and Earrings.
All the information you need for the project can be found in the Intro, so start there if you are just now joining the Series.
In Part 1, we created the Beaded Pearl Components, using a variation of the Tubular Herringbone Bead Weaving Technique.
In Part 2, we used the Simple Loop and Wire Wrapped Loop Techniques, to complete the Earring and Pendant Components and add the gorgeous Drop Beads and Crystals.
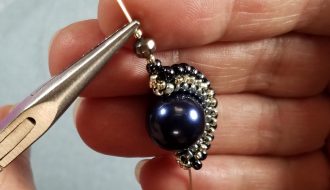
In this post,, I will show you how to make your own Earring Findings for your Jewelry projects.
In recent posts, I have share a few key concepts with you regarding the Gauge and Temper of Jewelry Metals.
In Part 2, I used 22 gauge dead soft wire for the wrapped loops on the Pearl Components.
The gauge of my wire was dependant on the size of the opening of the Pearl in the project.
I chose Dead Soft wire because it is easier to manipulate when making the wraps.
For Earring Findings, I like to use Hard or Half Hard Wire. Using a harder wire, cuts down on the amount of Hardening you will need to do with your Metals once the finding is formed.
Also I used the thicker 20 Gauge wire because generally speaking, this is the gauge used most often for Earring Wires. They fit most piercings the best.
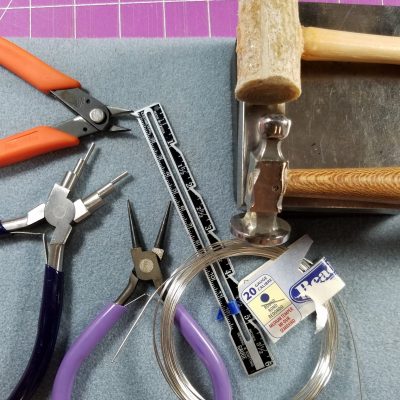
Tools and Materials for Ear Wires
- 5 inches – 20 Gauge Hard or Half Hard Jewelry Wire
- Flush Cutters
- Round Nose or Multi-Step Looping Pliers
- Ruler
- Rawhide or Chasing Hammer
- Steel Bench Block
- Cup Bur or Wire Rounding Tool
- *Sharpie or Dowel if you do not have Multi-Step Looping Pliers
In my Metalsmithing at Home Series, we talked about Basic Jewelry Tools from a Task Based perspective.
We can apply those tasks to every Metal Jewelry project although the steps and tools will vary a little each time.
Metalsmithing Tasks
To Work with Metal you will need a way to :
- Cut the Metal – Sheet, Wire, Rod
- Move the Metal – Flatten, Harden, Straighten
- Form the Metal – Shape, Roll, Remove, Refine
- Connect the Metal – Solder, Fuse, Cold Connections, etc.
- Polish and Finish The Work
In this project, we will Form the Metal before Hardening, but other than that, the steps are the same.
So let’s get started on our Earring Findings.
Cutting the Wire

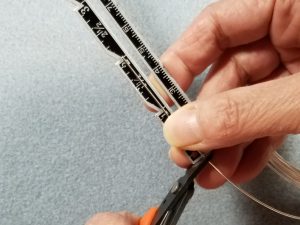


- Start by Cutting a Flush end on the wire.
- Measure down 2.5 inches and Flush cut the opposite end.
- Cut a flush end on the wire again.
- Use the first wire or ruler and Flush cut the other end the same size as the previous wire.
Tip – I always cut the end of my spool wire flush again before putting away.
Forming the Wire
In this step, I will be forming both wires at the same time.
By doing this, I can be sure to get the findings to match up perfectly, or as least as close to perfect as possible.
I strongly suggest that you practice using some cheaper wire to begin with, so that you do not wind up with a lot of waste with your precious metals.
In this tutorial I demonstrate the entire forming process using my Multi-Step Looping Pliers.
The process is different if you are using Round Nose Pliers and a mandrel, and it can be a little more difficult to make the wires match every time.
I will be making my Simple Loop using the smallest barrel on the Pliers and the largest barrel to form the curve.
Be firm but gentle with your pliers so that you do not mar your wire with tool marks.
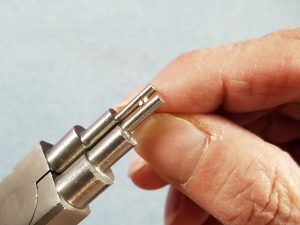
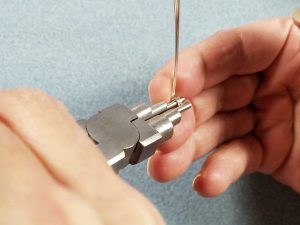
The Loops
- Line the ends of your wires up and grasp them between the barrels as shown.
- Make sure the ends are flush with the barrels and you can not feel the wire sticking up over the top by rubbing your finger over the set up.
- My small barrel is farthest away from me so I roll the pliers away from me.
- Roll as far as you can to bring the ends of the the wire down to the shank.
- Slightly open and position the pliers, then complete the loop until the end butts up against the shank and closes the loop.
- Keep the wires together as you remove them from the pliers, if they slip line them up again and hold together.
If you use Round Nose Pliers, read Perfecting the Simple Loop to insure your loops are the same exact size.
In the video, I leave a little space between the simple loop and the curve of the wire.
For this project, I do not do that. The Earring components are very long and I decided that a shorter Earring Wire would be best for this project.
The Curves
- With the Simple Loops lined up, position the wires so that the loops sit on top the second largest barrel.
- Use your thumb to push the long ends of the wire around the largest barrel and bring around until the wires point up parallel to the pliers. The wire should touch the top barrel of the pliers when done.
- Hold the two pieces firmly together when you remove them from the pliers.
- If they slip, line up the Loops and the Curves before continuing.
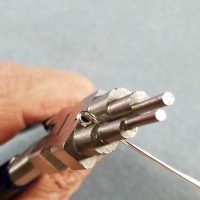
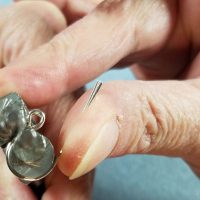
If you use a Sharpie or Mandrel to form your curves, make sure to line up the simple loops as closely as possible and form your Curves on both wires at the same time.
Hold the loops against the Mandrel as shown above, with the open end of the loops farthest away from the Mandrel.
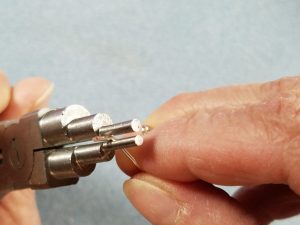
Finally, we are going to make the angled sharper bend on the back wire of the Ear Wires.
If you do not have the Multi-Step Pliers, take a sharpie and mark the spot on both wires where the bend should occur. Use Chain Nose or Flat Nose pliers to slightly bend the wire outwards to form the angle.
Snip away any excess with the flush cutters.
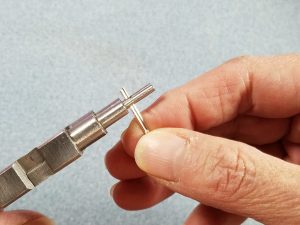
The Angled Bend
- Determine the spot on the wire where you want the angle to be.
- Make sure your Ear Wires are lined up and grasp the wires on the desired spot, with the smallest barrel, to the outside edge of the back wire.
- Bend a sharp slightly angled bend to the wire.
- My right index finger is sitting inside the curve of the Ear Wire and the simple loop is touching the middle finger, so I roll the pliers back towards myself to create the Bend.
- Before releasing the wires from the pliers. make any adjustment with the flush cutters to even up the end of the wires.
Hardening The Wire
If you used Hard or Half Hard wire for your findings, this will go very quickly.
Lay the finding down on the Steel Bench Block and lightly tap the wire several times while moving along the curve.
Check to make sure you are not changing the shape of your finding, if you are, tap lighter.
Harden the Curve of both findings
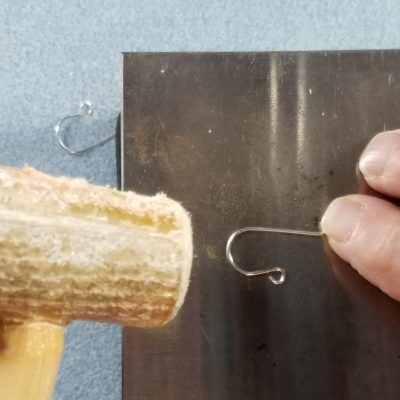
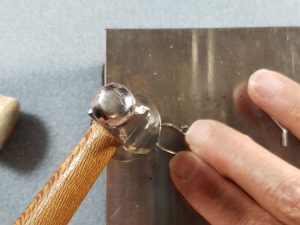
If you want to Flatten the Curve, use a Chasing Hammer for the previous step.
Metal on Metal will change the shape of the wire in addition to hardening the wire.
Remember to only hammer on the curve.
Repeat for the second finding.
Finish the Findings
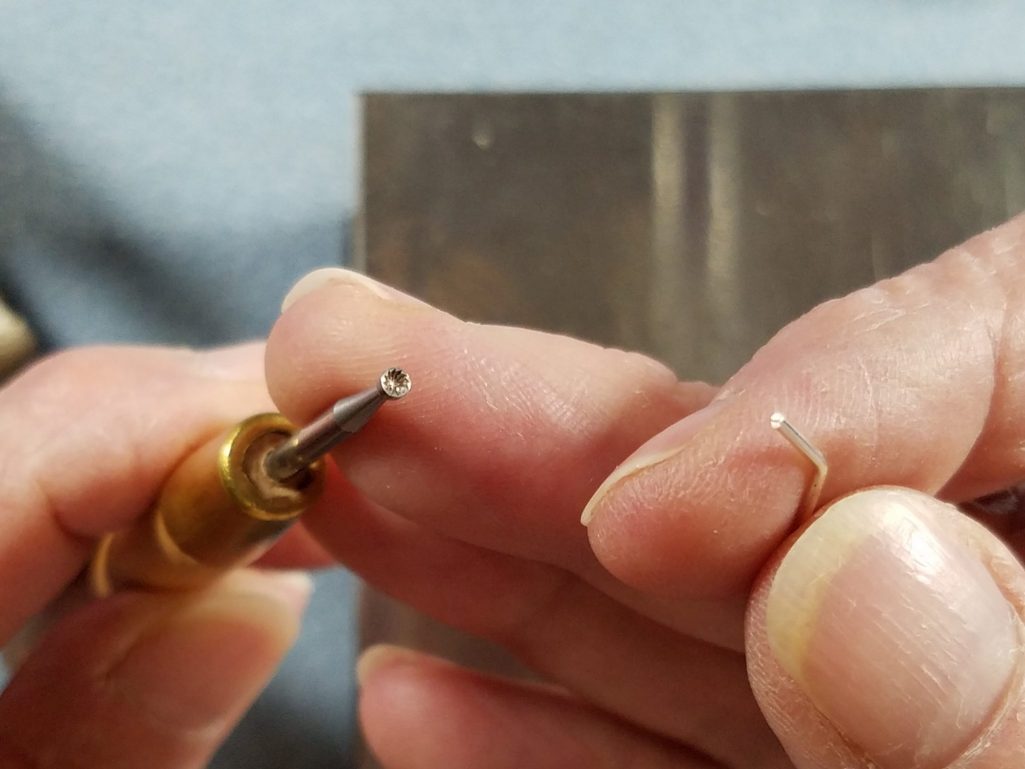
The Wire Rounding tool is simply a cup bur with a handle.
Use the tool or a Cup bur to round off the end of the finding so no sharp edges are left that can injure the ear lobe.
If you do not have these tools, you can use an emory board, sandpaper or file to do your finishing work.

If using bare metal wire, you may want to finish up by polishing the piece with a Pro Polish Pad to remove any oils etc. and to add a shine.
If you have tool marks, you can use a rubber wheel on your Rotary tool to remove them prior to polishing.
Connecting the Components
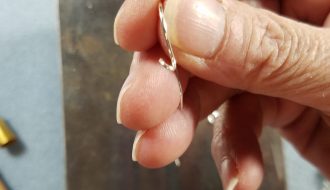
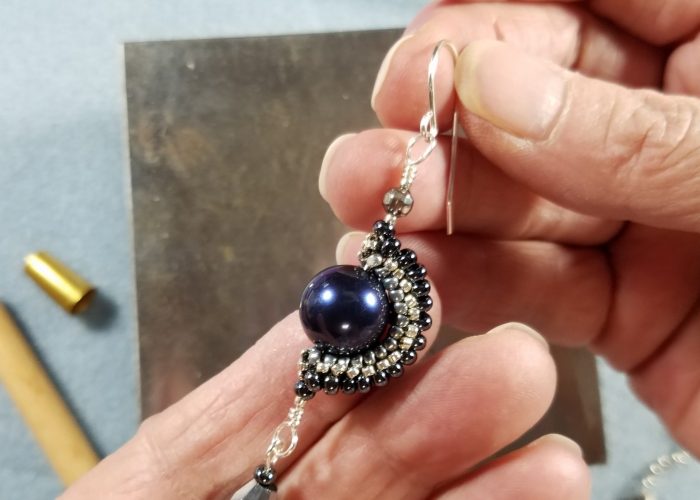
Using your Chain Nose Pliers, open the Loop by pushing sideways.
Attack the Wrapped Loop at the top of the Pearl Component and close the loop by pushing it back to center on the Ear Wire.
I hope you like this Tutorial, and remember that Practicing this technique will help you get the most from it.
Head over to The Alluring Bead Boutique’s Design Channel for more Projects for use with your Perfectly Matching Ear Wires.
This brings Part 3 of Pearls on the Halfshell to a close.
Stay tuned for the Part 4, The Beaded Links and Chain.